Getting Started with BlocklyProp Solo#
Link: Getting Started with BlocklyProp Solo
What it’s about#
BlocklyProp Solo is a visual online programming tool designed to work with robots and development boards featuring a Propeller 1 Multicore Microcontroller brain, such as the ActivityBot 360° and Propeller FLiP module. It allows users to build Propeller programs graphically, using specialized blocks to support sensors, servo motors, displays, and more.
What you need to get started#
A Windows, Mac, or Chromebook computer with a USB 2.0 compatible port
Permission to install BlocklyProp Launcher software (*Schools may need IT assistance)
Chrome browser (Explorer and Edge are not supported)
A Propeller board with its USB programming cable, such as:
(*The Launcher allows a USB connection for downloading code to your Propeller board. BlocklyProp Solo and the Launcher do not require any login and do not collect any user data.)
BlocklyProp Launcher#
BlocklyProp Solo, despite being an online programming tool, requires a utility on your computer to establish a USB programming connection with your Propeller board.
Installing the Launcher Ahead of Time#
Download and install the BlocklyProp Launcher for Windows or Mac, or get the extension for Chromebook, from the Parallax store site.
Alternatively, get the latest Launcher through BlocklyProp Solo itself by following the provided steps.
For more details, please visit the source URL.
Opening BlocklyProp Solo#
Once BlocklyProp Solo is open in Chrome and the Launcher and drivers are installed, proceed to connect your hardware and run your first project.
Connect your Hardware#
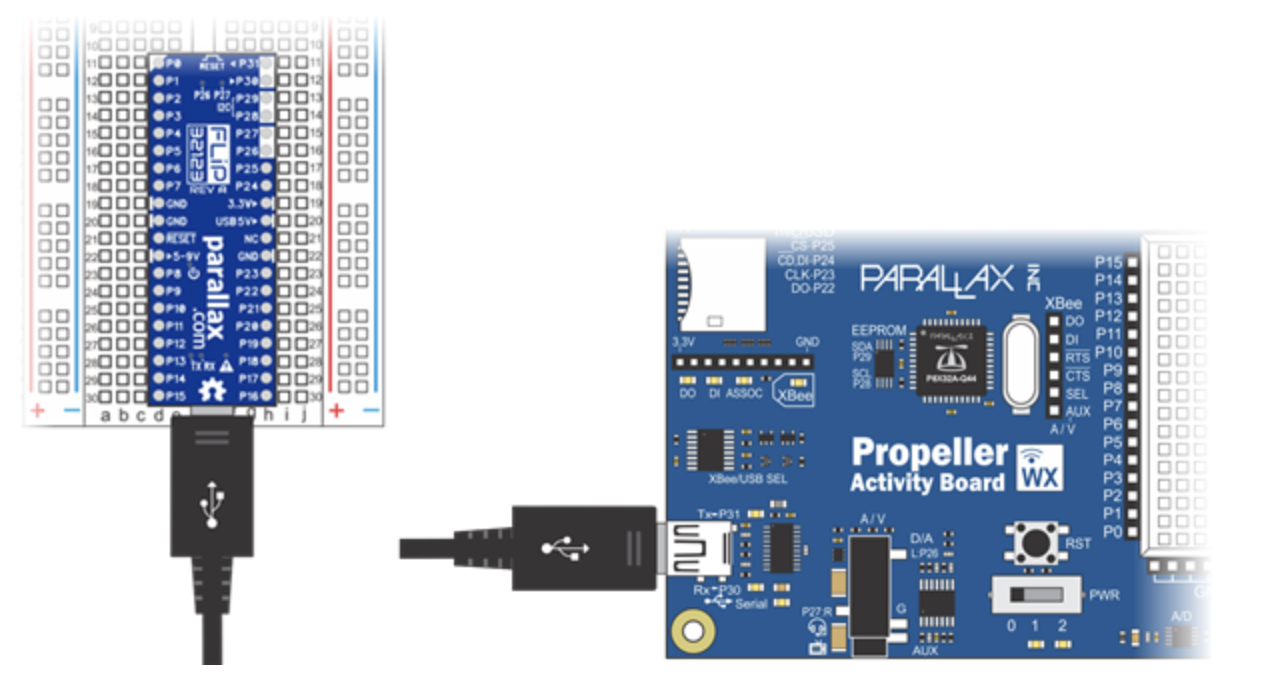
Connect your Propeller board to your computer’s USB port with its programming cable. Below are the Propeller FLiP module on a breadboard (left) and Propeller Activity Board WX (right).
Connect the other end of the USB cable to your computer’s USB port. Both the Propeller Activity Board and the Propeller FLiP module are powered through the USB connection.
f you are using an Activity Board, you will also need to move the power switch to position 1:
Create a Project#
BlocklyProp programs are also called “projects.” In the Edit pane, you build a project by making selections from the gray block menu to the right of the Edit pane.
Click Communicate, then Terminal.
A palette of Terminal blocks will appear. Notice that if you hover over a block, a yellow flyover message will give you hints about its use.
Click on the Terminal print text block to place it in the Editor pane.
From the port dropdown menu, select the COM port connected to your Propeller board.
Click the arrow button to run the project once. (It won’t be saved to the memory on your Propeller board.)
A terminal should open up, showing the “Hello!” message.
If you instead get an error message like the one below:
Check to make sure your USB cable is connected to both the board and the computer.
If you are using the Propeller Activity Board WX, make sure its Power switch is in position 1 or 2.
Check the port number in the error message. Then, check the port options in the BlocklyProp dropdown. If there is another port listed there, try it instead.
Back in the Edit pane, click inside the Terminal print text block and change the Hello message to something else. Also, check the new line box at the end of the block.
Click the Load RAM arrow button again to see your new message displayed.
Saving Projects#
There are two basic places where you can save the BlocklyProp projects you create: on your computer, and on your Propeller board’s EEPROM memory. Let’s look at the latter first.
Saving to the Propeller Board EEPROM#
When you used the green arrow to run your project, you were loading into RAM. You may have seen the flyover text when you clicked the button (left), or you may have noticed the Load Into RAM popup before the Terminal (right).
RAM, or Random Access Memory, is volatile, meaning it does not retain data if power is interrupted. If you run a project in RAM and then turn your board off and on again, the project will not run again because it is erased from the Propeller microcontroller’s RAM.
The Propeller Activity Board WX, Propeller FLiP, and similar development boards have an EEPROM chip connected to the Propeller microcontroller. EEPROM, or Electrically Erasable Read Only Memory, is non-volatile. When you load a project into EEPROM, it stays there even if the power is cycled, until you write over it with new data. Let’s try it.
Make sure your Propeller board is still connected to your computer, with the power switch on if it has one.
Run your Terminal print text project again by clicking the Load and run button.
Notice the message now says Load into EEPROM briefly before the terminal opens.
Press the Reset button on your Propeller board (above the switch on the Propeller Activity Board, or on the edge opposite the USB connector on the FLiP). This interrupts power and resets the Propeller microcontroller.
Each time you press the button, the message will reprint in the Terminal.
Saving to the Computer#
It is good practice to save your BlocklyProp projects to your computer frequently while you work. In fact, a message will pop up every 20 minutes to remind you. Once you load a project to your Propeller board EEPROM, you cannot get the project out and back into BlocklyProp.
Click the Save button.
Use the Save As dialog to choose a file storage folder, and to rename your project if you like. BlocklyProp Solo saves projects as a specialized .svg file type.
If your browser is set to automatically download to a default location, the file will be stored there. If there is already a file by that name, it will append a number to the end, such as Hello (1).svg.
To use a saved file, just click the Open button and browse to the file.
For the complete tutorial, including instructions on saving projects and troubleshooting, please visit the source URL.
Links: